Proper nozzle alignment is critical for achieving high-quality laser cutting results. A misaligned laser beam can lead to excessive dross, rough cutting edges, unstable piercing, and increased nozzle wear.
The BOCHU MCD100 Manual Center Device is designed to simplify beam centering and improve cutting consistency. This guide explains how to perform focal position calibration and beam centering during first-time use.
Why Use the BOCHU MCD100?
The MCD100 allows operators to visually inspect and adjust the laser beam position without relying on traditional tape-shot methods. The device provides real-time feedback, helping users quickly identify beam offsets and accurately center the beam within the nozzle.
Benefits of Proper Alignment
- Improve cutting quality
- Reduce dross and burrs
- Ensure stable assist gas flow
- Reduce nozzle consumption
- Minimize production downtime
- Improve cutting consistency
Step 1: Focal Position Calibration
Important: Focal position calibration must be completed before using the MCD100 for the first time. This process establishes the correct reference position for beam centering.
1. Position the Device
Place the MCD100 under the cutting head.
Align the red dot pointer with the center hole of the device and power on the unit.
This ensures that the system starts from the correct reference position.
2. Move the Cutting Head
Using the wireless remote controller, trigger the cutting head to move downward until it reaches approximately 1 mm above the MCD100 window.
The device is now ready for calibration.
3. Observe the Beam Pattern
Watch the display screen carefully.
A properly calibrated focal position will produce:
- A concentrated beam spot
- Stable beam image
- Consistent beam position even when the device is moved slightly
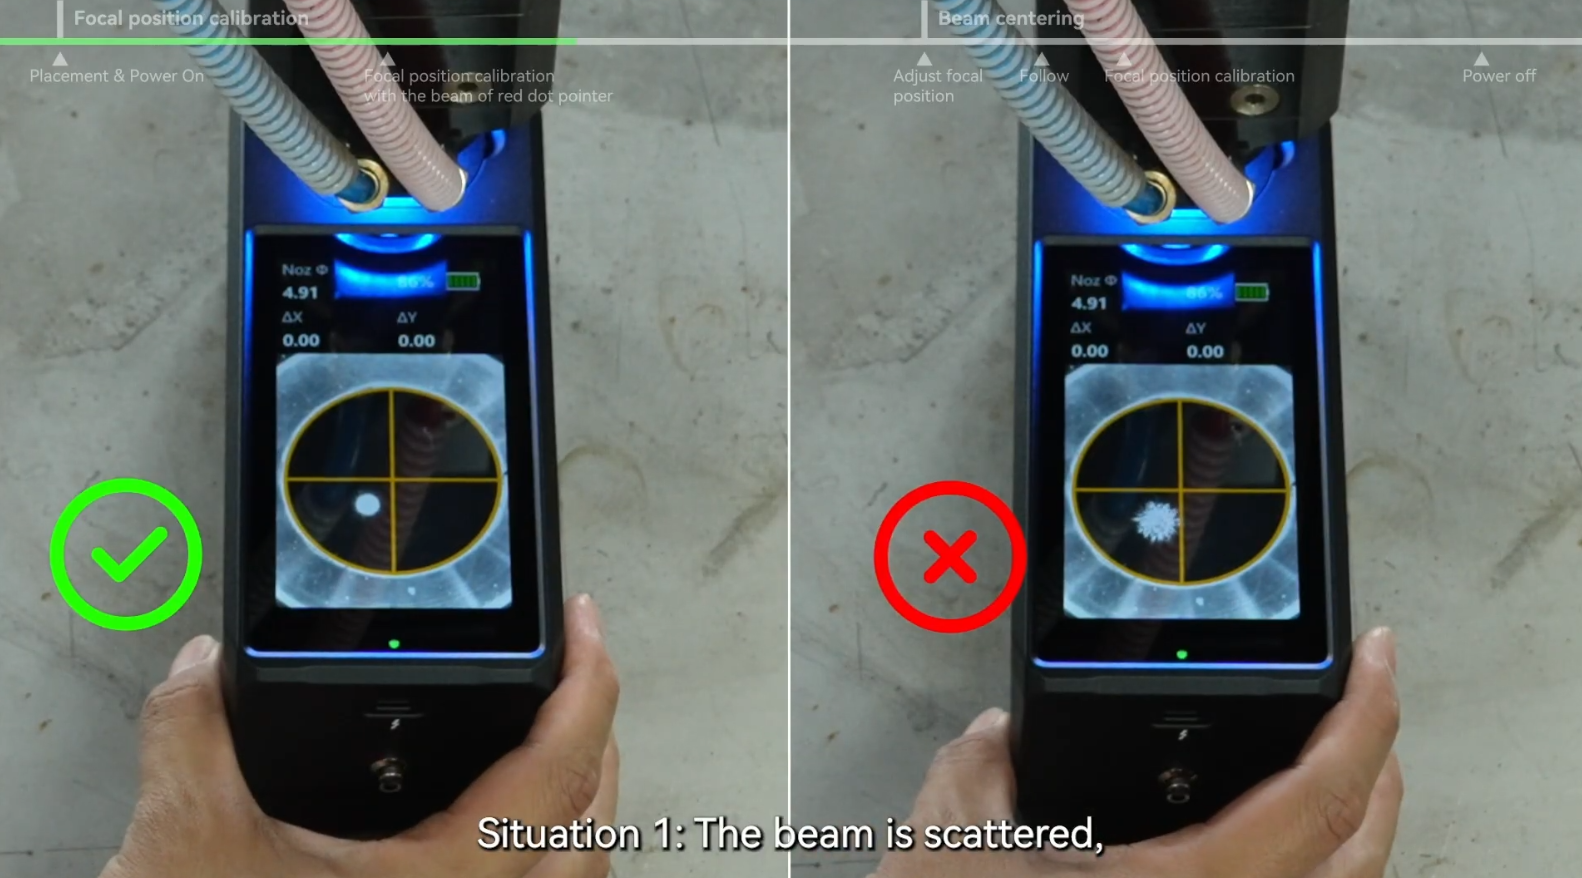
If the beam appears scattered or unstable, calibration adjustment is required.
4. Adjust According to Offset
The MCD100 provides visual feedback for beam offset correction.
Large Offset Adjustment
When the beam deviation exceeds approximately ±5 mm:
- Perform coarse adjustment
- Gradually move toward the center position
- Continue monitoring the display until the beam becomes stable
Small Offset Adjustment
When the beam deviation is within approximately ±2 mm:
- Perform fine adjustment
- Optimize the focal position
- Verify beam stability before proceeding
Once the beam remains concentrated and stable, focal position calibration is complete.
Step 2: Beam Centering
After calibration, the next step is centering the laser beam within the nozzle.
1. Set the Focus Value
Set the cutting head focus to the previously calibrated value.
For example:
Focus Position: -10 mm
Then move the cutting head to the 1 mm working position.
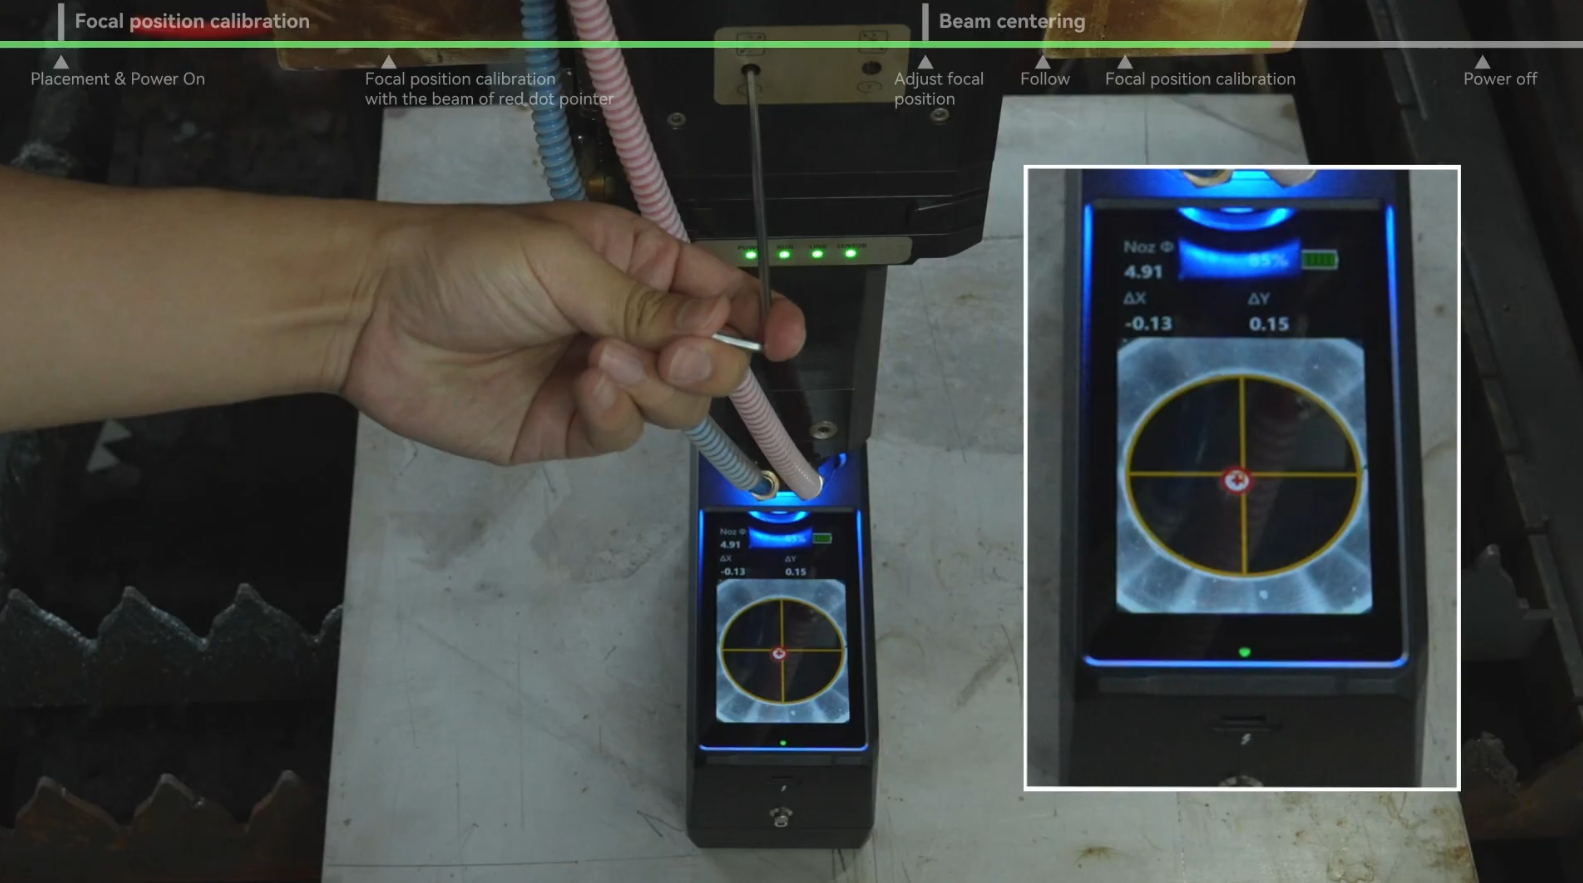
2. Adjust the XY Centering Screws
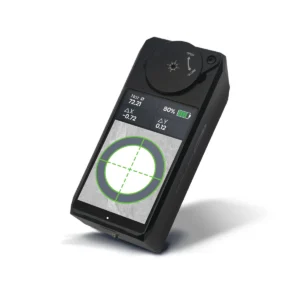
Observe the interface displayed on the MCD100.
Manually adjust the X-axis and Y-axis centering knobs on the cutting head.
The display provides real-time feedback during adjustment.
3. Monitor Nozzle Status
The software uses color indicators to simplify alignment.
Yellow Nozzle Outline
Yellow indicates:
- Beam is not centered
- Further adjustment is required
Green Nozzle Outline
Green indicates:
- Beam is centered successfully
- Alignment is complete
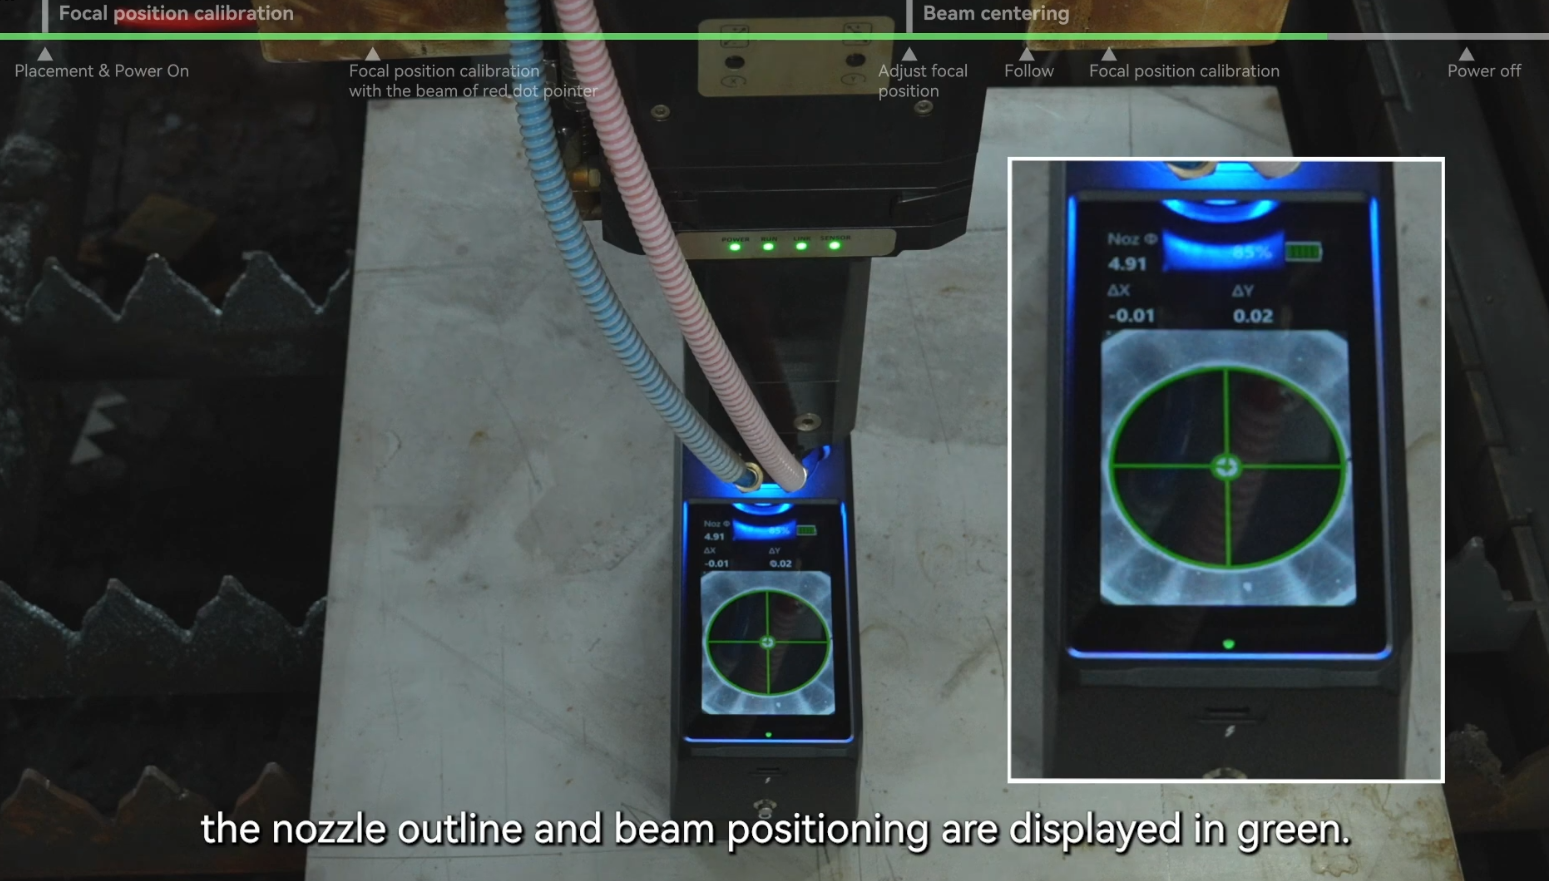
Continue adjusting until the nozzle outline changes from yellow to green.
4. Complete the Process
Raise the cutting head after centering.
The MCD100 will automatically return to its initial state.
The beam centering process is now complete.
Common Alignment Issues
Beam Remains Yellow After Adjustment
Possible causes:
- Incorrect focal calibration
- Excessive beam offset
- Mechanical adjustment range reached
Recheck focal position calibration before repeating beam centering.
Beam Image Appears Unstable
Possible causes:
- Incorrect head height
- Dirty protective window
- Optical contamination
Inspect the optical path and repeat calibration if necessary.
Best Practices
To maintain optimal cutting quality:
- Check beam centering regularly
- Re-align after nozzle replacement
- Verify alignment after collisions
- Inspect protective lenses for contamination
- Perform calibration whenever optical components are serviced
Conclusion
The BOCHU MCD100 Manual Center Device makes laser beam alignment faster, safer, and more accurate than traditional methods. By completing focal position calibration and beam centering correctly, operators can significantly improve cutting quality, reduce dross, and extend consumable life.
For technical support, product inquiries, or compatibility information, contact Brogo Laser.
Products
-
 Gweike 6 in 1 M2/M3 Series CNC Laser Cutting Welding Machine Lens Nozzles Parts
$0.80 – $2.50
Gweike 6 in 1 M2/M3 Series CNC Laser Cutting Welding Machine Lens Nozzles Parts
$0.80 – $2.50
-
 43x2mm Laser Protective Lens for Pulsed Laser Cleaning Machine
$0.90
43x2mm Laser Protective Lens for Pulsed Laser Cleaning Machine
$0.90
-
 BOCHU Nozzle Visual Alignment Tool for Fiber Laser Cutter
$700.00
BOCHU Nozzle Visual Alignment Tool for Fiber Laser Cutter
$700.00
-
18×2mm Laser Protective Lens for Fiber Laser Welding Machine | SUP20S SUP21 SUP23 Compatible Protective Window Glass
$0.50
-
 Brogo Galvo 20W Compact and Integrated Fiber Laser Engraver Marker for Metal with 4.3" x 4.3" Working Area
$1,699.00
Brogo Galvo 20W Compact and Integrated Fiber Laser Engraver Marker for Metal with 4.3" x 4.3" Working Area
$1,699.00